2020年5月17日 星期日

20200517-解鎖Flux Welding

這台林肯140兩用電焊機買來兩年都未開機,今天終於開箱和小玩一下,結果雖然不是很漂亮,但是焊透了6mm的鋼板連結起來還蠻興奮的,以後再多加練習吧。有電焊能力,可以修的東西更多了。


直接上3500瓦發電機,這樣很有機動性


這水泥地之前常被油壓頂車機壓碾導致地面破裂,我找了2片6x12(厚度6mm)墊在地上,並把2片左右兩旁焊在一起,這樣不怕2片鋼板從連結處移動走位。這是一邊,另一邊也如法炮製。

2020年4月26日 星期日

20200425-2009 MB E350 front brakes restoration

按理說這是一個下午的工程,結果卻花了2個半天的時間才完成。為何? 主要是除鏽上漆的時間趕不得。從除鏽、上高溫底漆,上高溫黑漆再上數道高溫透明漆,週末黑手可沒偷工。

原本碟盤銹蝕不堪,其中的煞車活塞作動也不甚理想,所以就訂一整套zimmerman 防銹通風碟和整新煞車組,兩者剛好都於星期五寄到家裡,因為龜毛,動工前還先用空壓機吹出煞車活塞至一半,檢查活塞狀態以確定活塞作動良好,之後才把原本煞車組拆下來。然後防塵檔片同時進行除鏽上漆,最後再把新碟和整新煞車組裝上,接著更換煞車油。


舊碟盤狀況不良
從地上掉滿訂銹屑就知一二
原本剎車組放在車胎上就不折到管線
鍍鋅的通風碟,希望可以撐久一點
整新的煞車夾具
裝上來令片警示線,還差一個束線片就好了


束線片,煞車碟研磨均勻,煞車靈敏制動非常好。

2020年4月5日 星期日

2020年4月4日 星期六

20200404-change cabin filter on 2017 Toyota Sienna

下置物箱打開後,右下方即可看到卡榫
一隻手就可以解開卡榫
上面的卡榫要用力推開
2
UP左右兩邊的卡榫拉開就可看到室內濾網
3
才2年舊的濾網居然這麼髒!
換在Advance Auto買的濾網
裝上就收工

2020年3月15日 星期日

20200315-clean ac evaporator with an endoscope

開空調有異味,在不大拆儀表板的前提下,應該只有用內視鏡清洗蒸發器一途。


首先,將star bit固定在wrench
鼓風機下方底殼疑似有不明黴班,用清潔劑刷洗和陽光殺菌
上方圖片共有8顆螺絲要鬆開,中間那2顆是在鼓風機取下之後才需要拆
刷洗過後,陽光晾乾
內視鏡綁清潔劑注入軟管
內視鏡連軟管從鼓風機管路伸到蒸發器,然後把一整瓶清潔劑噴光,然後我又加Lysol殺菌

從AMAZON買附接頭的清潔劑


開暖氣吹乾,同時我再以空壓機送風加速吹乾

最後將鼓風機裝回去,試車確定沒錯誤燈號,完工。

2020年1月11日 星期六

20200111-Restore wheel rim for 2009 Mercedes E350 and NYS inspection

又該2009 Mercedes E350做NYS年度車檢的時候,我自知車況OK要過車檢沒問題,但是車廠一定會針對雨刷和輪胎來囉嗦(a.k.a勒索),坦白說右後輪胎的確有變型的狀況,所以不勞對方動口,乾脆先自行了斷,我先更換雨刷,也從網上訂了2顆245/40ZR-18輪胎把後面兩輪全換,其中原後乘客座輪圈邊緣凹陷輕微變形導致容易消風漏氣。還好我有一個full size的備用輪圈,無奈狀況不佳,所以我得事先修復備用輪圈並上漆,用它替換原來的乘客座輪圈,如此一來車廠自然無話可說,車檢當然一次順利過關。本篇主要是記錄輪圈修復。

用Bondo Metal Reinforced Filler, 90451先修補如上圖小缺角,兼用100-220-600號的砂紙來回研磨,這是最花時間的
上底漆 (Bondo Gray Filler Primer, 00720)
上銀漆
這部分含AMG字樣原凹了一大痕 ,又是不規則的形狀,很難補,所以乾脆連同AMG字樣都補平。
連內面都上有耐高溫的透明保護漆
載去給車廠換胎然後再驗車
這角度看起來還蠻有質感的

2019年12月11日 星期三

20180715-DIY Tire/Wheel Lifter

One of the hazards for a DIY car mechanic like me is hurting the lower back or shoulders by lifting wheels/tires.
Unfortunately I have to deal with that quite often when I work with brakes/rotate tires/ change snow tires for multiple cars...
Thus, I hope to find a cheap tire lifter but Commercial Tire/Wheel Lifter usually cost $1500+ which is way above my budget. So, I decide to build one myself. 

Revision: actually a Hydraulic Table Cart + a pair of rubber wheel chock may be an easier but even better (versatile) alternative solution. See illustrations in the bottom.  


Mover's Dolly+Scissor Lift Jiffy Jack is my basic concept.


Actually this bike Scissor Floor Jack Lift hoists Center Stand is almost perfect except it is a little bit high for me. Because most time i use a floor jack on the drive way, the minimum height should be as low as possible.

I decide to go for the lower profile version of  bike Center Scissor Lift Jack Hoist Stand $80

plus roller bracket $25 x 2


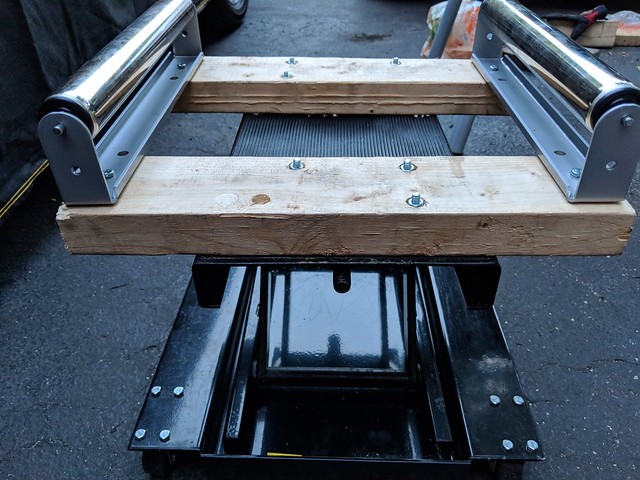
Piece them together with some 2" hex bolts and nuts, then Ta ta... Here it is

IMG_20180715_204046

Testing

IMG_20180715_204147

Spin the tire easily

IMG_20180715_204221

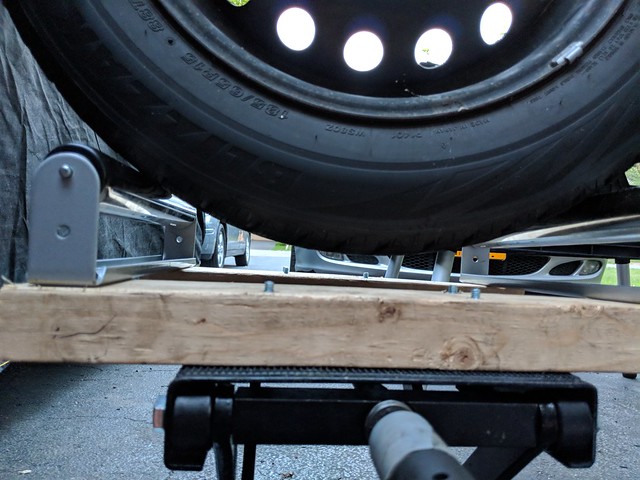
essily move to position ( the minimum height)IMG_20180715_204821

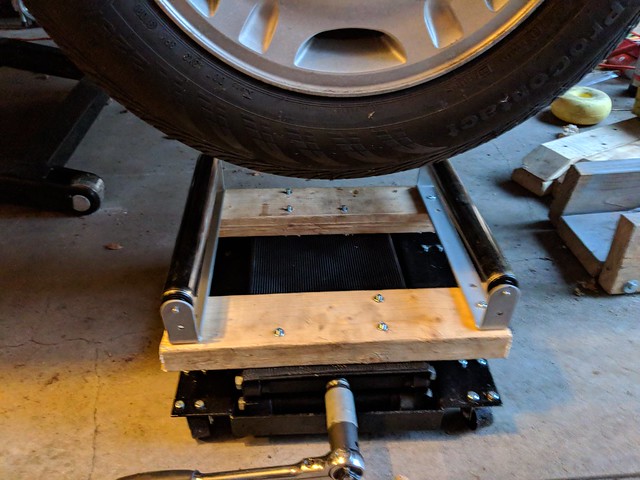
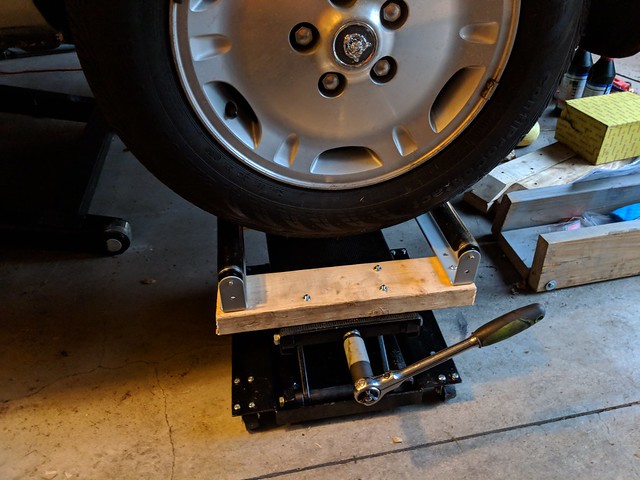
Rise to catch the tire securely and so nice to my back!
IMG_20180715_204735

alternative replacement: Hydraulic Table Cart+ 2 wheel chocks


plus


If you put a pair of wheel chocks on the table, you will have the similar functions of the wheel lifter. Unfortunately, a higher clearance from the flat ground is required. That is the catch! 

This combination may cost around $200 (500LB capacity)-$300(1000 LB capacity) but the Hydraulic Table Cart alone will help you to achieve more.